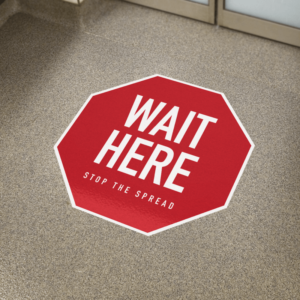
The Key to Applying Floor Graphics: A Step-by-Step Guide
Floor graphics are an innovative way to enhance visual communication, guide traffic, promote branding, or simply add aesthetic appeal to any space. Whether used in retail environments, offices, schools, or public spaces, the key to their effectiveness lies in proper application. Here’s a comprehensive guide to ensure your floor graphics are applied flawlessly.

- Preparation is Crucial
Before applying floor graphics, meticulous preparation is essential. The surface must be thoroughly cleaned to ensure the adhesive sticks properly and the graphic remains intact over time.- Clean the Surface: Sweep and vacuum the area to remove any dust, dirt, or debris. Use a damp mop with a mild detergent to clean the floor thoroughly. Avoid using harsh chemicals that could damage the floor or interfere with the adhesive.
- Dry the Surface: Ensure the floor is completely dry before application. Moisture can compromise the adhesive, leading to bubbles or peeling.
- Gather the Right Tools
Having the right tools on hand will make the application process smoother and more efficient.- Squeegee: For smoothing out the graphic and ensuring proper adhesion.
- Tape Measure: To accurately position the graphic.
- Masking Tape: To hold the graphic in place during application.
- Utility Knife: For trimming excess material.
- Lint-Free Cloth: For a final wipe-down of the surface.
- Positioning the Graphic
Correct positioning is critical to the effectiveness and aesthetics of the floor graphic.- Measure and Mark: Use a tape measure to find the exact placement for your graphic. Mark the edges lightly with masking tape or a pencil.
- Dry Fit: Lay the graphic on the floor without removing the backing to ensure it fits the space correctly and is positioned as desired.
- Applying the Graphic
The application process can vary slightly depending on the type and size of the graphic, but the general steps are consistent.- Peel Back the Liner: Start at one edge and peel back a small section of the backing liner. Be careful not to touch the adhesive.
- Initial Adherence: Align the exposed adhesive edge with your markings and press it down gently.
- Smooth Out: Using a squeegee, slowly press the graphic onto the floor, working from the center outward to prevent air bubbles. Gradually peel back more of the liner as you go.
- Check for Bubbles: If bubbles form, gently lift the graphic and reapply. Use the squeegee to smooth out any small bubbles
- Finishing Touches
Once the graphic is applied, it’s important to ensure it’s securely adhered and looks perfect.- Trim Excess: Use a utility knife to carefully trim any excess material around the edges of the graphic.
- Final Smooth: Give the entire graphic one last pass with the squeegee, focusing on the edges to ensure they’re firmly stuck down.
- Clean Up: Remove any remaining masking tape and give the graphic a final wipe with a lint-free cloth.
- Maintenance
Proper maintenance will prolong the life of your floor graphic and keep it looking great.- Regular Cleaning: Sweep and mop regularly to keep the graphic clean. Avoid using abrasive cleaners or tools that could scratch the surface.
- Inspect Frequently: Check the edges and corners periodically for lifting or wear. Promptly address any issues to prevent further damage.
Conclusion
Applying floor graphics can be a straightforward process if you follow these key steps: thorough preparation, accurate positioning, careful application, and regular maintenance. By doing so, you can ensure your floor graphics remain vibrant, effective, and long-lasting, making a strong visual impact in any space.
Remember, the success of floor graphics doesn’t just lie in their design but in their application. A well-applied graphic can elevate the aesthetic appeal and functional value of your space significantly.
